
Transforming your bathroom doesn't have to involve messy tile installations or expensive refurbishments. Shower panels provide a modern, stylish, and cost-effective alternative that's completely waterproof, easy to maintain, and perfect for DIY enthusiasts.
Our comprehensive, step-by-step guide will show you how to install wet wall panels effortlessly, delivering professional results.
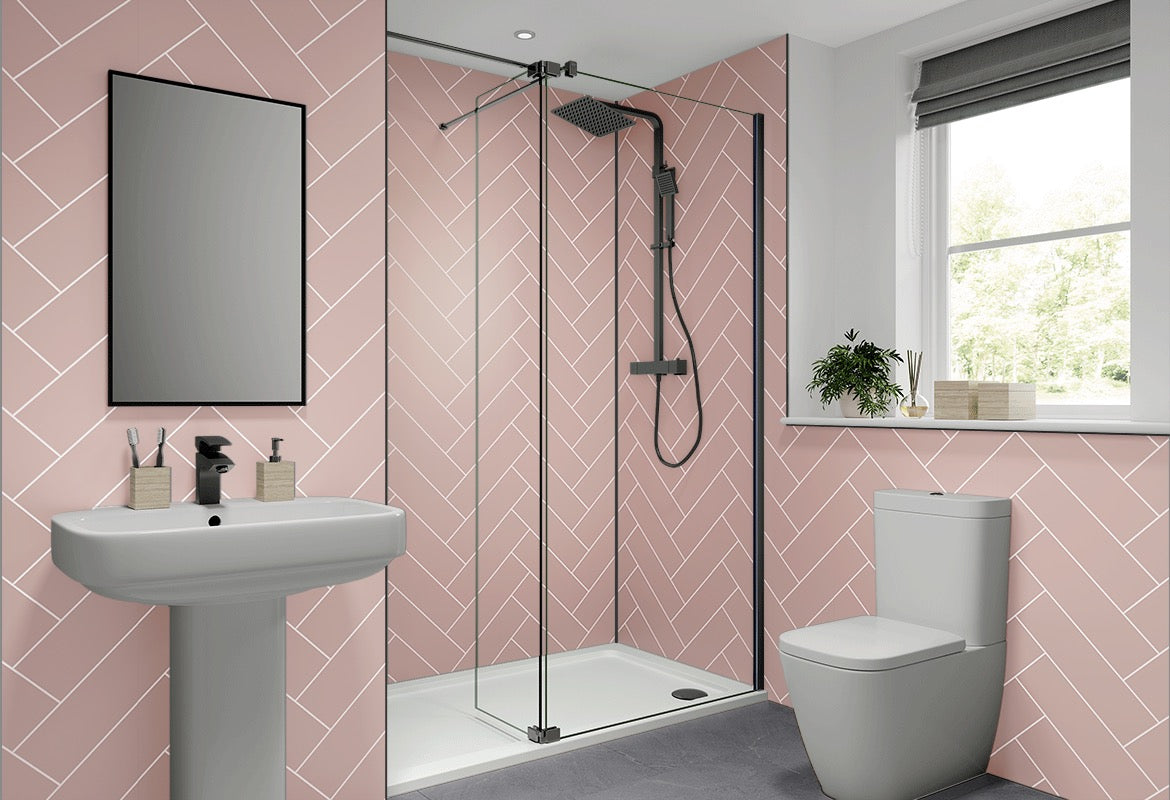
Why Choose Shower Panels?
Shower panels are the popular choice in Central Scotland, thanks to their waterproof nature, which eliminates the mould and mildew issues associated with tiles. Unlike tile, shower panels have no grout lines, which significantly reduces maintenance. This innovative wall panel system offers quicker installation when compared to traditional methods, providing a stress-free DIY solution.
Installation Preparation
We've made fitting bathroom wall panels easy! A sound installation starts with the right preparation to ensure a perfect finish.
-
Take measurements of your bathroom to confirm panel sizes before ordering.
-
Inspect existing wall surfaces carefully, making sure they're clean and dry.
-
Remove loose tiles, and use a sanding pad to roughen glossy tiles, ensuring the wall panel adhesive grips securely.
-
Clean the existing surface thoroughly with a cloth.
What You’ll Need for Installation
The following equipment and supplies are required to install your bathroom wall panels:
-
Standard woodworking tools (saw, tape measure, spirit level)
-
High-quality adhesive made for wall panels
-
Electric caulking gun and silicone sealant
-
Internal corner trim, wall trim, trim plates, and bullnose edge trims
-
Optional corner shelving and shower fixtures
All these materials are available at your local hardware store.
Everything you need to install your panels is available in one place. Contact us if you need help choosing what to order and get the right kit delivered straight to your door.
Choosing the Right Panels
Wet wall panels come in a variety of materials, including PVC panels, acrylic panels, and premium options such as Multipanel and Fibo panels. The PVC panels are budget-friendly, while the acrylic and premium panels offer enhanced durability and a wider range of finishes.
Panels typically come with either a tongue system or square edge finishes. Tongue-and-groove panels allow for seamless installation by concealing fixings within the joints, while square-edge panels may require purchasing additional trim to achieve a neat finish.
Knowing the Different Types of Panels
When selecting your shower wall panels, you'll encounter various edge types. Panels with a groove edge, part of the tongue-and-groove system, ensure smooth, invisible seams by connecting panels tightly together. These tongue-and-groove panels interlock securely, making them ideal for a neat finish.
Additionally, consider bottom panels specifically designed for use along the base of your shower or bath area. These bottom panels add extra waterproofing protection by keeping water from getting in at the floor level and protecting the materials underneath from damage.
Not sure which style works best in your space? Order a wall panel sample and see the quality for yourself before making a commitment.

Step-by-Step Guide to Installing Shower Wall Panels
Ready to roll up your sleeves and transform your bathroom with stylish new shower panels? This detailed installation guide provides a step-by-step instruction on how to install shower wall panels, making your DIY wet wall installations easy, even if you've never picked up a caulking gun before.
Step 1: Cut and Measure the Panels
Before fitting wet wall panels, measure each wall area, marking dimensions clearly on your panels. Measure twice, cut once. It's a cliché because it's true! Using your standard woodworking tools, accurately cut each panel, starting with the first panel and then the subsequent side panels.
If you're unsure about your cutting skills, practice first on spare materials or cardboard templates.
Step 2: Applying Adhesive
Add adhesive evenly across the back of your panel, applying a generous but smooth layer. Ensuring you add adhesive thoroughly helps clear air pockets and creates a secure bond. Apply adhesive evenly using a notched trowel, especially close to edges where lifting is more likely to occur.
Quick reminder: Selecting the correct adhesive is essential for wet wall panel installation. Make sure your glue is made for wet areas, because regular glues won't work in wet places.
Step 3: Install the First Rear Panel
Starting from the interior corner, place the first rear panel against the prepared wall to begin installing your wet wall panels. Firmly press it into place. Insert the internal corner trim neatly into the internal corner to achieve a smooth, waterproof finish. Use your spirit level to make sure the panel is perfectly straight and level.
You can get help with this step from a friend or family member. Holding and aligning panels becomes much simpler with a second set of hands.
Step 4: Installing Side Panels
Continue installing wet wall panels on side walls using the groove system, carefully sliding each panel into the next to create seamless joins. Make sure existing surfaces, especially areas with exposed tile, are clean to ensure excellent adhesion.
Think of fitting panels like putting together a large-scale jigsaw puzzle. The good news? You won't lose any pieces behind the sofa!
Step 5: Additional Rear Panels
When installing additional rear panels or your second rear panel, align each panel carefully, sliding each tongue into the matching groove. This creates a seamless, wall-to-wall finish that looks professional and sleek. Make sure panel edges align precisely, checking with a spirit level frequently.
Pro Tip: If you're worried about getting the alignment just right, you could use small wooden spacers to keep the gaps even before you fully secure the panels.
Step 6: Installing Shower Accessories & Valves
Carefully measure and mark the exact spots where your shower valves and other fittings will go. Be careful when cutting panel openings to make sure they are accurate so that fixtures fit tightly. Use plenty of silicone sealant around these holes after cutting to make sure your waterproof panel system stays that way.
Spend some time on this step. Accurate measurements now save hassle later!
Step 7: Apply Sealant and Fit Final Trims
After installing shower wall panels, apply silicone sealant generously along all edges, corners, and fixtures using your electric sealant applicator. Add finishing touches by fitting wall trims, trim plates, and bullnose edge trims, giving your installation a professional, polished appearance. Allow sufficient drying time as specified by your sealant's instructions before using your new shower.
Fitting bathroom wall panels is simple when you follow the detailed installation guide, helping you achieve a stunning, hassle-free bathroom makeover with confidence.
Latest Installation Tips
-
Before you install wet wall panels, let them get used to the bathroom for 24 hours.
-
Check the alignment often during the installation process.
-
To keep the waterproof seal intact and stop leaks, spread the silicone sealant evenly.
Applications for Wall Panels
Wall cladding isn't limited to bathrooms. Consider using wall panels for kitchen backsplashes, utility rooms, laundry rooms, commercial settings like hair salons, and even retail spaces. Wall panels offer an ideal solution for high-moisture areas, significantly improving hygiene standards due to their easy-to-clean surfaces.
Common Issues and How to Fix Them
-
Moisture Behind Panels: Moisture trapped behind panels can cause long-term damage. Ensure walls are thoroughly dried before installation, and always check for any leaks or dampness regularly after fitting.
-
Adhesive Issues: Weak adhesion can lead to panel displacement. Always use high-quality adhesive, apply it evenly, and strictly follow the manufacturer's instructions regarding curing times and conditions.
-
Visible Seams: Visible seams detract from the professional look. Maintain proper alignment, use appropriate trims, and apply silicone sealant carefully along seams to ensure professional-looking, waterproof finishes.
Maintenance and Care
Shower wall panels offer far easier maintenance than traditional tiling. There’s no grout to scrub or reseal, and their smooth surface makes everyday cleaning quick and hassle-free. Simply wipe them down with mild detergent and a wet cloth to keep them looking fresh. Avoid harsh or abrasive cleaners, which can dull the finish over time.
It’s also important to check joints and edges every few months. If you spot any wear, reseal using a quality silicone to maintain full waterproof protection. This routine care goes a long way, keeping your panels hygienic, preventing mould, and protecting the walls beneath.
Thanks to their durable design and thick adhesive bond, these panels hold up well in various wall applications, from bathrooms to utility rooms and commercial washrooms. With minimal effort, you can keep your space clean, stylish, and moisture-free for years to come.

FAQs About Fitting Shower Wall Panels
Can I install shower wall panels over existing tile?
Yes, installing bathroom wall panels over existing tile is possible, provided the tiles are securely fixed and even.
What are typical wet wall panel sizes?
Wetwall sizes typically range from 250mm to 1200mm wide and 2400mm to 2700mm high. Always verify exact sizes when ordering.
How much does a wet wall panel weigh?
The weight of wet wall panels varies depending on the material. PVC panels are lightweight, while premium acrylic or Multipanel options are slightly heavier.
Are shower panels completely waterproof?
Yes, shower panels are waterproof, making them perfect for wet areas. Proper sealing ensures they remain watertight.
Do shower panels require special cleaning products?
No special cleaning products are necessary. Clean them regularly with mild detergent and a damp cloth.
Why Choose Shower Panels from Us?
At Wet Wall Panels, we offer handpicked collections of bathroom wall panels tailored to every budget and interior style. Our knowledgeable staff provide expert advice, ensuring you achieve professional-quality results.
-
Cost-Effective: Get premium finishes without the high cost.
-
DIY Friendly: Our shower panels can easily be installed by anyone with basic DIY skills.
-
No Grout, No Hassle: Simplify installation and maintenance compared to traditional tiling.
-
100% Mould Resistant: Keep your bathroom hygienic and pristine effortlessly.
We're committed to outstanding customer service, offering direct delivery without showroom overheads or pushy sales tactics.
Don’t tile it. Panel it!
Transform your bathroom with premium panels that are built to last. Explore the full wall panel range online and order directly with no showroom hassle.